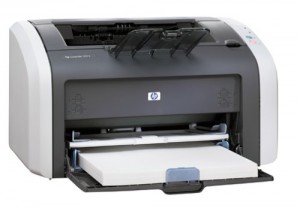
HP LaserJet 1012
Here’s how to install the HP LaserJet 1012 on Windows 10
- Plug in the HP LaserJet 1012 via USB cable. Windows will try to install it and it will look like it’s installed but it wont actually work. You’ll be able to see it in the device manager as an “unspecified device”, but you wont be able to print.
- Download the Microsoft Windows Vista (64-bit) driver for the HP LaserJet 1012. We’ll use the Vista 64-bit version on Windows 10 with no issues.
- Extract the ZIP archive and make a note of the location on your hard drive.
- Hit Windows-Q to launch the search charm and type in “Devices and Printers”
- Click on the “Add a printer” button
- Click on “The printer that I want isn’t listed”. Skip the option for “My printer is a little older…help me find it” as that wont work.
- Select the radio button for “Add a local printer or network printer with manual settings”
- Select the radio button for “Use an existing port” and then select “DOT4_001” from the dropdown. Click “Next”. If you have more than one “DOT4_XXX” option make note that we may have to change something later.
- Click “Have Disk”
- Browse to the location you noted in Step 2 and click “Ok”
- Select “HP LaserJet 1012 HB” and then click “Next”
- Give the printer a name, click next, accept any security warnings, etc.
Changing the Printer Port
- Hit Control-Q to launch the search charm and type in “Devices and Printers”
- The HP LaserJet 1012 should be listed under printers. Right click and select “Printer properties”. Note that this is different from the old “properties” tab that was in previous versions of Windows.
- Click on the “ports” tab and scroll to the DOT4_XXX options
- Select a new option and save the settings. You may have to do this a few times until it locks on to the port that the HP is assigned to.
Thanks Dave
Perfect instructions and worked like a dream.
Dave, thank you, worked great!
Great !! Thank you for your help for installin Laserjet HP 1012 on Windows 10. It is so simple that I wonder why HP don’t do the job…
Probably just because supporting drivers for every operating system is a challenging job. And it doesn’t sell new printers!
Wow, this worked!!!! So happy! Thanks for sharing!
Thank you so much, it worked lika a charm. I had almost given up on getting it to work! You made my day 🙂
For some reason the drop down box for the radio button “Use an Existing Port” is empty. Any thoughts on how this is?
Thanks.
Worked fine. Thanks. Liz
Thanks for the instruction. I had to make modification to Step #4 since it didn’t work for me. I went into “Settings” and selected “Devices”. I followed with Step #5 along with the remaining steps and it worked!
This worked perfectly – thanks Dave!
Thank you … I’m printing again … until the next Windows update.
I haven’t had Windows Updates undo any of these changes, but you may have to reconfigure this again if you upgrade to a newer version of Windows (whenever that may be released)
Wow great!! finally it works thanks so much!
Dave, everything looked good, big step forward! When I print to the LJ 1012 from the connected computer running Vista, it works great. When I print to the LJ 1012 over the network from either Windows 10 computers, the output is streaked. Many blank horizonal lines neatly arranged down the entire page. I tried a PDF document and an Open Office text document. Any ideas?
To be honest, I have no idea why there are streaks. I had a similar issue when printing in Windows 8 where watermarks from Microsoft Word only printed every other letter, and I assumed it was some kind of rendering issue that was incompatible with the way I implemented this solution. See Installing HP LaserJet 1012 on Windows 8 for more info on that, but I don’t think I’ve had that particular issue in Windows 10.
As an aside, mainstream support ended for Vista in 2012 and extended support ends April 11, 2017. You may want to consider upgrading before April as there likely wont be any security patches after that time. I’ve installed Windows 10 on some pretty old and slow machines with no issues, but, as with anything, your mileage may vary.
installing for windows 10 did not work because there is no mention of that Dot4_001 in my list any ideas?
DOT4_001 may or may not exist depending on your configuration. If there is another similar one, try that.
As others have said, these instructions are perfect, easy to follow and I can continue to use my HP1012 (for which I still have two toner cartridges). Thank you very much for the time you put into discovering how to do this and freely sharing it.
Thanks Dave you’ve saved me from all the stress
Thank you so much, Dave! My printer lives!
I’m doing a happy dance! Thank you so much for this solution. My favorite printer had been sitting on the shelf for months (with a fresh supply of ink), because I couldn’t find a solution. This absolutely worked!!
Thank you so much!
Oh wow, like magic!!! Thanks so much, Dave
Perfect. You helped me a lot!
There is a driver for Windows 10 for the HP Laserjet 1015 which works very well.
Good to know. I haven’t tried that driver yet.
Thank you Dave and Ian!!!!! The vista 64 wasn’t available anymore but, I did get the 1015 64 bit. I had to putz a bit to get it to work. For other seekers, after running the new application in downloads, I went to add a printer, followed Dave’s instructions, but had to use the “Windows update” rather than “Have disk” then found & selected the HP 1015 driver. In next window, changed printer name to 1012. I have spent hours searching & trying to get this to work. I had gotten it to print test pages, but nothing else. Now it does. It would have been a real waste for me to have to toss this like-new printer, because I print very little at home.
Thank you so much!!
Hi I am still having trouble installing this HP Laserjet 1012 printer in a windows 10, 64 bit laptop. I also tried installing it using the 1015 driver Ian recommended. I really need help please! I also have a question, at then end of the process it is asking if you want to use the driver that is currently installed or if you want to replace the current driver. I tried both options but it it still didn’t work.
Hello Dave,
Your instructions for drivers for the HP 1012 were exactly what I needed — except HP no longer has drivers on their site for this printer. It was your instruction to save to a different port if needed, so I used DOT4…002. Currently I believe HP has deleted any support for this printer. I have the files that I downloaded for another pc and after choosing “have the disk” and selecting file hpc1015w, it works just fine. THANK YOU — couldn’t have done it without your instructions.
John
Dave, I have a HP-1012 printer. How do I download the Vista 32-bit driver? Last time, it was Vista 32-bit which worked for Win-7, but lets say I get another Win-7 32-bit system what then? Why can’t HP just let well enough alone, instead of discontinuing their old drivers? Or are there any easy instructions for me to copy the necessary file(s) from my Win7 system to any new 32-bit Win-7 system I may acquire? The reason I’d look for a slow system, is because I’m electrosensitive to speedy, dual-core systems. I feel so hopeless, given my situation.
Well, all software manufacturers have to stop supporting old versions at some point and it’s just a business decision of how much time, effort, and money they want to invest on maintaining software for which they’re no longer selling hardware. And HP’s hand is somewhat forced by Microsoft who officially stopped supporting Windows 7 in January of 2015.
But – this link should get you the correct driver. It’s for Vista, but should work on 7. http://ftp.hp.com/pub/softlib/software10/COL27081/lj-67503-1/lj1010serieshb-vista32.zip
Dave thank you SO much for responding. How long will your download-link be active?
And which folder should the file be saved to when/if I’d get another Win7 system?
It was even nightmarish figuring out what to do last time, because at first I had followed some instructions which hadn’t worked for me, so it dragged out forever, until finally, the Vista worked. I’d have to go back to my looong fiasco thread to try and decipher what exact steps might work. the next time around I seem to recall that it needed to be the correct combo of choices involving two drop-down menu’s at one point or another. And so help me, if i happen to click a “yes” during some choice which should have been “no” (or vice versa).
I don’t suppose you know whether there are any decent options for someone like me these days, with a 14″ or 15″ Pixel-Qi easily-dimmable type of screen, as well as 1.6ghz or lower (not dual core), and no cordless mouse, no WIFI, and no touchscreen? Even better would be a Pixel-Qi type, with E-ink option.
>> Dave thank you SO much for responding. How long will your download-link be active?
I’ll keep this blog post up for a long time, but I don’t know if/when HP will remove the driver from their site. My recommendation would be to download the file and keep it somewhere so that you have it for future installations.
>> And which folder should the file be saved to when/if I’d get another Win7 system?
Just keep the file that you download and use the installer that way you don’t have to worry about migrating files and trying to replicate settings.
>> I don’t suppose you know whether there are any decent options for someone like me these days
No, sorry. That’s a pretty specific configuration and I wouldn’t feel comfortable making a recommendation on that. Sorry.
So I assume I can just download it to MyDownloads folder, and from there, copy it to a folder on my USB stick?
As for the installer, where would i find that?
The installer would be the file you downloaded from HP.
Dave, are the instructions on below link accurate for Windows 7? (not just XP/Vista?
(Link Removed)
I don’t know specifically about the site you linked, but I recommend never downloading drivers from third-party sites because you never know what you’re getting. The could be legitimate drivers, or full of malware.
Wow this is working…. but something weird append.
Whatever is text or graphic, if i have more than 1 page, the printer stop for about 7-10 seconds between each page.
For example, if i want to print a 12 text documents, the printer take 30sec to 1 minute to print the first page (the led green is blinking), after the page is printed, the green led still blinking and print the next page 7-10-15 seconds later.
For 2 or 4 pages is “ok”, but withbig documents is taking sooooo much time to print, there is a very very big delay between each page.
Any solution for me? Need to enable something in the printer proprety? Thanks alot
Yeah, that happens to me sometimes too. I’m not sure what the fix is.
I sure hope I got the right guy to help me get my LaserJet 1012 back on the road. I got to set 4 and then I got lost…Hit Control-Q to launch the search charm and type in “Devices and Printers”. I don’t understand Control-Q? I unzipped the files but don’t know what to do with them.
Sorry, for being a little thick, but that is just me. I do need your help, please.
Oops – that was supposed to be Windows-Q! I fixed it in the instructions above. Thanks for pointing that out!
thank you thank you thank you, Dave… after wasting almost 2 hours i found your instructions on amazon comments and was able to install the driver on my win 7! my goodness, HP supports is so useless and convoluted!
Hello Dave
I was so happy to have the promise of being able to use my 1012 again. Although I’m not talented I did follow your instructions for use with windows 10. Needless to say my computer was configured a little different in some ways but it did seem to be working out in the end, except that I get no response from the printer. I tried going through the process again, no change. The printer works and the computer reports that it’s all fine. I’ve clicked PRINT from several different spots and got the message that it had been sent to the printer but and no response. Nothing in the printer queue . So now I’m sad again. Is there any hope?
Woo-hoo! Thank you, you are awesome!!
Great tutorial, for those who don’t see the DOT4_001, download the driver for 1015 in HP.com, then proceed with this tutorial.
Thank you!
So I have done this and still no DOT4 showing up…any suggestions?
Is there another DOT option to explore?
Same issue. No DOT option. Before finding you, I saw the same info in a video. I ‘created’ the DOT 4 thinking I could trick it. lol
Which video did you watch?
You can manually create the port, but it involves a few extra steps.
Thanks so much on this one, this comment saved me. Now I can print as well 🙂 Thanks!!
You are the MAN! You helped us when we got a Win 7 laptop to install our HP Laserjet 1012. When we got a Win 10 laptop you came through agin helping us install the HP Laserjet 1012. Thank you.
Glad it helped! Twice!
THANK YOU THANK YOU THANK YOU!!!!!!! Like many others you have helped, I am extremely grateful for your instructions in getting my HP Laserjet 1012 back on the road. I am not a techie and was so frustrated when I bought my Windows 10 computer to discover my printer was not compatible. Of course, I still had a full cartridge of toner! After months of having to sneak to print a few pages at work or having to travel to the library I decided to just buy a new printer.
The prices weren’t bad but something told me to try one more time to get my printer to work. Remember, I am not technically proficient, but your instructions were clear and after mucking around a bit I have achieved success. You are a GEM! Thank you so very much!
Glad it saved you from buying a new printer!
it worked! thanks so much 🙂
Super, thank you
Whenever Windows 10 updates, I lose it in choices for printers on my programs even though it shows up in my list of devices.
That’s odd. I haven’t seen this behavior on any of our systems.
i had this working for years, now suddenly when I send an item to the print queue, i see the item, it shows printing and is gone. But nothing actually prints?? Ever see that before? Also the odd part is, this is only on one of my Win10 machines. Works fine on another.
I haven’t seen this on the HP 1012. We had this problem on an older BizHub all-in-one at the office, but that was caused by the printer being detectable on the network, but the device didn’t have the hardware chip for printing, so it basically took the items in the print queue and trashed them. (That was a hardware issue, not a Windows issue.)
I’d recommend making sure Windows is completely patched and try again. If that doesn’t work, reinstall the printer.
Let me know how it goes!
Worked! Thank you! This printer just keeps on going, for 15+ years now!
For sure, it’s a workhorse!
I used the above mentioned steps about a month ago, and it worked. But now, after one or two Windows updates, the printer stopped working and no longer showed up in my device list. I tried repeating the process to re-install, but now the Laserjet 3055 PLC5 is not a selectable option using the Windows Update button. The Laserjet 1015 isn’t either. I tried the Laserjet 3050 PLC5 and 3050 “series” PLC6 with no luck. The test page reads “incompatible”.
Any ideas?
Hi, Dave, i’m back! Albeit now its issues with Win10 vs. Win7. It’s terrific of you to help so many of us with our printer-driver issues. Since a pic is worth 1000 words, below is a pic of what’s going on at my end.
At this time i’m trying to install HP LaserJet 1018 on my Win10 IdeaPad. (Win10 itself is a learning curveball!)
As you can see, once I reached Item #8 of your instructions, my dropdown isn’t reflecting everyone else’s because DOT4_001 isn’t listed on mine.
Please see this:
https://ibb.co/9ppWksn
P.S. Dave, though by now i did get the lj 1015 driver installed on my Ideapad’s Win10 (using Virtual USB001), yet it’s not printing! So i’d much appreciate if you could see my below thread (which i’d meanwhile created on DSLreports).
Can you possibly help me figure out, based on all the clue’s in my thread, what’s the Missing Puzzle Piece? Why it’s not printing for me, even though it works for so many others?
My forum thread:
https://www.dslreports.com/forum/r32596615-installing-HP-LaserJet-1010-series-on-Windows-10
What is it doing or not doing? Are you getting any errors? Did the test page print correctly?
Hi, Dave, guess what – I can’t believe it. I was hassling for days & hours on end with zillions of painstaking screenshots that I edited and posted on forementioned thread. Barely any normal sleep for me this week.
But as of these past hours, I FINALLY got it resolved via the freeprintersupport video found on youtube!! EUREKA!
I’m really grateful to you, as well, since your site and commenters’ feedback at least PROVED to naysayers that old HP’s can still work with Win-10.
Otherwise i’d have given up. Thanks! Now you may wanna update your blog with clear printed instructions (as compared to the too-speedy, non-vocal, video which made my eyes swim!
P.S. I forgot to mention:
As you can see from my dslreports thread, the crazy thing is, that my own 1018 CD failed to work, possibly because the Win x64 version may have been missing on mine, rather just x32. Whereas freeprintersupport offered the 1018 driver download for Win x64.
There’s also something weird, in that DOT4_0001 doesn’t display for everyone, rather just USB_001.
Dave, maybe you can tack this onto my above post, rather than a bunch of choppy comments. If I recall, I think I needed to disconnect & reconnect USB plus printer-switch at the tail end, in order to boost it to work.
My procedure (February 2020):
1) Look for the “HP Universal Print Driver for Windows PCL” for Windows
2) Click and expand “Driver-USB”. Download and install “HP LaserJet USB (DOT4) communication driver for Windows 8 and Higher (64-bit)”. This will install the missing DOT4 port if it does not exist
3) Expand “Driver-Universal Print Driver” and download “HP Universal Print Driver for Windows PCL6 (64-bit)”
4) Unplug the printer USB cable
5) Unzip and run the installer. Select “USB Plug and Play” mode.
6) Select to remove any old universal driver and add the new one to the Windows archive.
7) Wait for the driver to be installed, and when the installation ends plug the USB cable again.
Windows should recognize and install the printer.
Whoever you are…. I LOVE YOU! I finally bought a new cartridge for my old printer, only to then realize it wouldn’t work on Windows 10. I tried many other directions from other sites, but yours finally WORKED! Thank you!!!!!! You saved me money and this old printer can now live another life.
I’m almost there. To print one page, I have to turn the printer off, turn it back on, print a test page and then send it to print.
Any suggestion on what I can do to make it print more efficiently? Thanks so much!!!
I’ve tried this and there is not “DOTanything” port listed.
Instuctions say “Click on the “ports” tab and scroll to the DOT4_XXX options” I don’t have this option on Windows 10?? Help
Found one of these at Goodwill lol. Unopened Refurbished from HP. Thanks for the instructions, got this dinosaur working!!
That’s an awesome find!
hello. can you help installing the drivers for macos big sur?
No, sorry. I don’t know MacOS at that level
I have Windows 10 I following all the procedure, withing install LJ 1012 but if I send the test page, the it come blank the printing has come no stopping, I don’t no what is happened
Thank you! Had this perfectly good printer and had no idea how to connect. Went thru a lot of other posts, and none of them worked. Love how you tell us what NOT to use, tho it may seem perfectly logical to click on those options.
Awesome! Glad it worked!
I have been working to restore the printer driver for HB 1012 on this Windows 10 computer on and off for over 3 weeks. Your instructions worked perfectly. Just had to navigate to HP to download the Vista 64-bit zip package. Am very grateful for your help.
Glad it worked for you!
What do i do if there is no DOT4_001 on my windows 10 prof?
Dec, 2022 and still working like dream .. thank you very much and Merry Christmas
Glad to hear it! Merry Christmas!
Still working after all these years. This little printer still gets the job done. Just make sure you’re downloading and installing Vistax64 if you’re on 10×64.
Dave,
Thanks for the great writeup. But it didn’t work for me.
I have a windows 10 system, and I have an old HP1012 that works great, it was last used on XP on a different computer..
I plugged it into the windows 10 system, initially it beeps and it fails to install. I refreshed, and then I went through the text above. Everything seemed to go smoothly. But I cannot print.
It was using USB_002. I had no DOT_4, but I found that and installed it. I’ve since tried both with the same result.
I downloaded the X64 Vista driver from HP. Installed that.
Now I can send a test page, and it just sits there in the queue. I had three queued up but the printer is not blinking.
So nothing is working at all. I have the printer right now listed under printers and set as default. I can open the properties and send a test page, but the green light never blinks and nothing prints. No error message appears.
As a test just now, I unplugged the USB and plugged it back in. I got the normal Ding when I did that.
The printer is now listed by name as unspecified at the bottom of the devices, so the system has identified it. It is also listed in printers but never prints.
I think that the system P&P has installed it again as an unspecified device is a clue here. Clearly the system thinks it has that printer but it really doesn’t because the P&P installed it again as an unspecified new device.
So the system thinks that printer is not a printer, it doesn’t know what it is.
I just removed the device as a printer, (It’s still listed as unspecified) the remove dialog had a UAC shield, but it did not give me a UAC popup. I think that is also a clue.
I just removed it and clicked add printer. I said it was local at the bottom. Clicked the DOT4 port and the LJ 1012 x64 vista driver in have disk. It is installed again, but it never prints. I sent a couple of test pages to in, the first one eventually said error. The second one did not. Deleting the first test page from the queue results in the second one declaring an error printing in the queue.
I just removed the device as a printer, and unplugged/replugged the USB and I got the ding, the device now loads as a printer, it appears in unspecified and then gets it’s name and moves up to printers!
I’ve now tried the HP universal printer driver pcl6 and the pcl5 one too. Both act the same.
At another location I had this very same printer and it still worked after I upgraded from Windows 7 to Windows 10, because it was there at the time and the OS upgrade took care of it.
This system was also upgraded from Windows 7 but this printer was never installed before the OS upgrade. Another clue. Apparently Microsoft and/or HP don’t want these old printers installed anymore but if you have it when you upgraded your OS they kindly allowed you to continue using it. I find that suspicious. Someone said try postscript. I haven’t tried yet.
Any ideas ?
Wow, you tried a ton of things!
Unfortunately, I’m not going to be much help as I don’t have this printer in my office right now.
I’d recommend running Windows Update to check and see if there are any updates for any of the windows subsystems. The printer queue is a bit finicky so, for fear of sounding like L1 tech support, I’d advise a reboot and see if that helps.
Microsoft definitely wants to limit the number of devices it must support because keeping all of those live just increases their cost over time. HP wants to sell new printers, for sure, but they really want to sell new ink/toner as that’s where they make all of their money. (There was a company a few years back that gave away printers just to lock you into their ink system). But just like Microsoft, HP wants to limit the number of ink/toner cartridges they want/need to produce, and the technology does change making some of the older systems, well, old. And they took a bunch of heat for the chips in the inkjet systems that wouldn’t let you refill or even operate at low ink levels, so whether it’s natural obsolescence, planned obsolescence, or a regulatory agency telling HP to knock it off, yeah…HP wants and needs to sell you new hardware and supplies!
I did try a ton of stuff. I am self sufficient, so when I need help there’s not likely to be any.
I just sent a print job to the printer, and it’s blinking. Not sure what that means.
But I had a printer just like this at another location that I upgraded from Windows 7 to 10 and the printer kept working. Call me cynical, but I suspect that HP and Microsoft made a decision to avoid causing problems on OS upgrades. So they disabled that afterward by removing some software component that kept it working. And if the printer is not on that computer when you upgrade the OS it silently fails to install that component.
At 19 PPM this is a very effective printer. It’s still blinking but has not errored yet.
As to HP taking heat about their chips, they are corporate outlaws. It’s outrageous that you can buy an HP inkjet cartridge, and it’s all new and would work if installed but it won’t work because of the date expiration. A fake failure. I bought too many cartridges and they are now no good? Really?
Worked like a charm. Thank you good sir.
Still relevant! Thanks for the advice, it still works!